

How to Trim Dog Nails at Home: Safe, Easy, and Fear-Free Guide for 2025
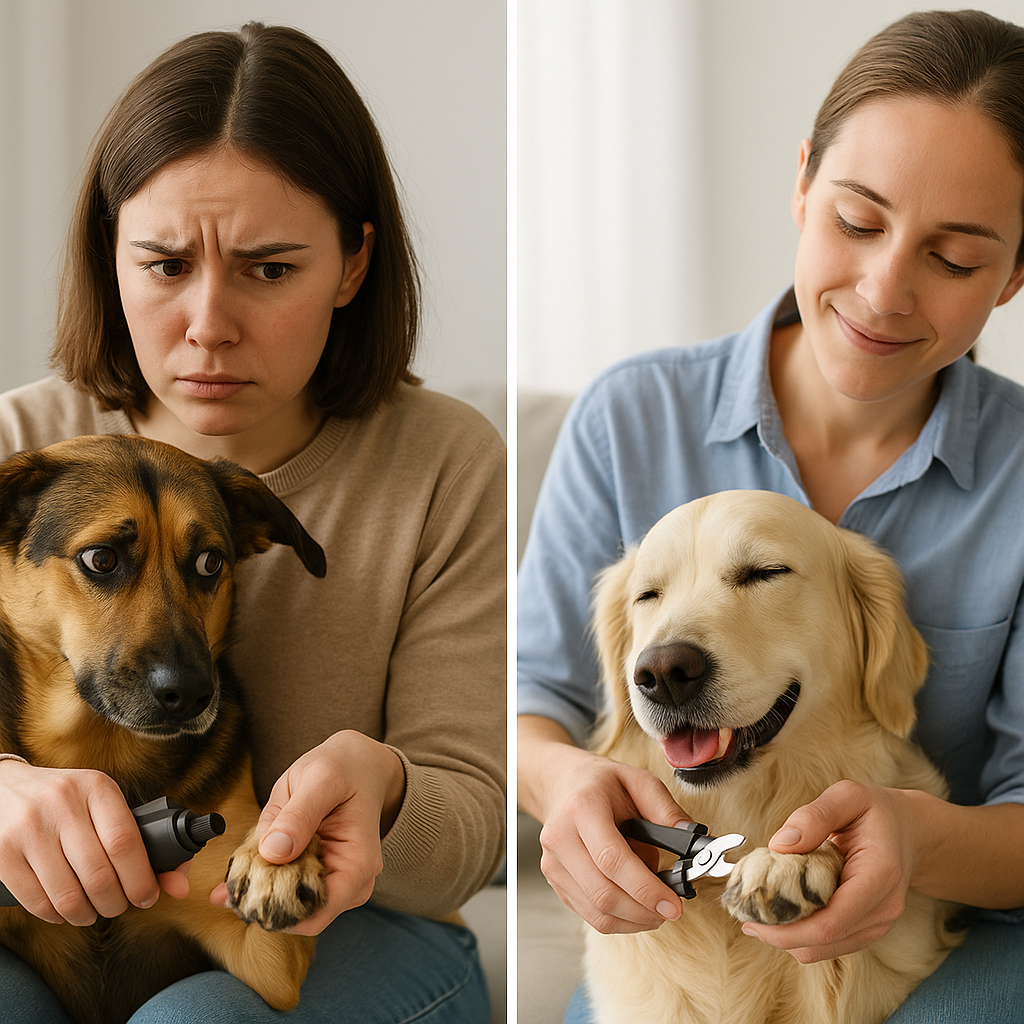
Keeping your dog's nails trimmed isn’t just about looks—it’s about their comfort and well-being. Overgrown nails can cause pain, affect their posture, and even lead to injuries. The good news? You can handle this at home! With the right tools and a focus on safety, you’ll learn how to trim dog nails like a pro. Plus, making nail care a regular habit helps your furry friend stay happy and healthy. It’s easier than you think, and your dog will thank you for it!
Key Takeaways
-
Cutting your dog's nails often stops pain and posture issues. It helps them walk better.
-
Use good tools, like LED nail clippers, for safe trimming at home.
-
Keep the area calm and give treats to make nail cutting fun for your dog.
-
Trim a little at a time to avoid hitting the quick. The quick can hurt and bleed if cut.
-
If your dog struggles, pause and stay patient. This builds their trust and comfort slowly.
Why Trimming Dog Nails Matters
Preventing pain and posture problems
Your dog’s nails are important for their comfort and movement. If nails grow too long, they can press into paw pads and hurt with every step. Long nails also change how your dog walks. They might shift weight oddly to avoid pain. This unnatural way of walking can stress their joints and muscles. Over time, this may cause arthritis or joint pain.
🐾 Tip: Trim nails often to help your dog walk naturally. This lowers stress on their legs and hips.
A study shows trimming nails stops overgrowth, keeps movement easy, and reduces joint stress. Proper nail care helps your dog walk and run without pain or posture issues.
|
Benefit |
Description |
|---|---|
|
Prevents Overgrowth |
Regular trims stop pain and problems from long nails. |
|
Maintains Mobility |
Short nails help your dog move easily with good posture. |
|
Reduces Joint Strain |
Long nails can misalign toes, causing joint stress and trouble. |
Minimizing injury risks from overgrown nails
Long nails aren’t just painful—they can be harmful. Overgrown nails may break or get caught on things, causing injuries. Torn nails can bleed and might get infected if ignored. Studies show that long nails are a common problem in dogs, affecting 7.1% of those visiting vets in England.
Trimming your dog’s nails often lowers the chance of these injuries. It also prevents paw deformities caused by neglected nails. Healthy nails mean fewer vet visits and a safer, happier dog.
Promoting your dog’s long-term comfort
Think about walking with sharp nails digging into your feet. That’s how your dog feels with overgrown nails. Painful nails might make them stop walking, leading to changes like aggression or licking their paws too much.
Trimming nails isn’t just about avoiding problems—it’s about keeping your dog comfy every day. Short nails let them walk, run, and play freely. Regular trims also keep their paws healthy and improve their overall happiness.
🐶 Note: Learning to trim dog nails correctly helps you care for your pet better.
Getting Ready for a Safe Nail Trim at Home

Must-have tools and what they’re for
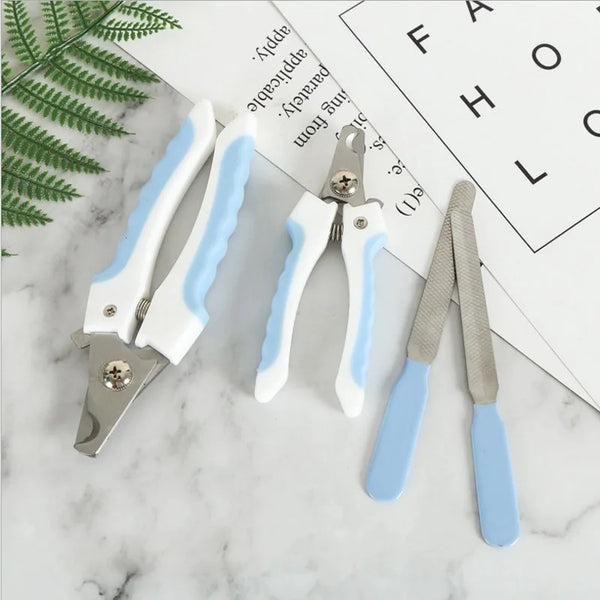
Before you start trimming your dog's nails, gather the right tools to make the process smooth and safe. Using proper equipment ensures clean cuts and reduces the risk of injury. Here’s a quick checklist:
-
LED Pet Nail Clippers: These clippers come with an integrated LED light to help you see the nail quick clearly. The sharp stainless steel blades make precise cuts, while the ergonomic handle keeps your grip steady.

-
Professional Pet Nail Clippers with Light: Designed for accuracy, these clippers feature a half-moon blade that follows the natural curve of your dog’s nails. The built-in light improves visibility, and the anti-splash guard keeps your space tidy.

-
Pet Nail Clippers with Safety Guard and File: These clippers include a safety guard to prevent overcutting and a nail file to smooth rough edges.
If you prefer a grinder, tools like the Dremel PawControl or the Dremel AT02-PGK Pet Grooming Attachment Kit are excellent options. They provide a smooth finish and are ideal for dogs with thick or irregular nails.
🐾 Tip: Let your dog sniff and explore the tools before you start. This helps reduce fear and makes the experience more positive.
Setting the scene: calm spaces and timing
Creating a relaxed environment is key to trimming your dog’s nails safely at home. Choose a quiet space where your dog feels comfortable, like their favorite room or a cozy corner. Avoid loud noises or distractions that might make them anxious.
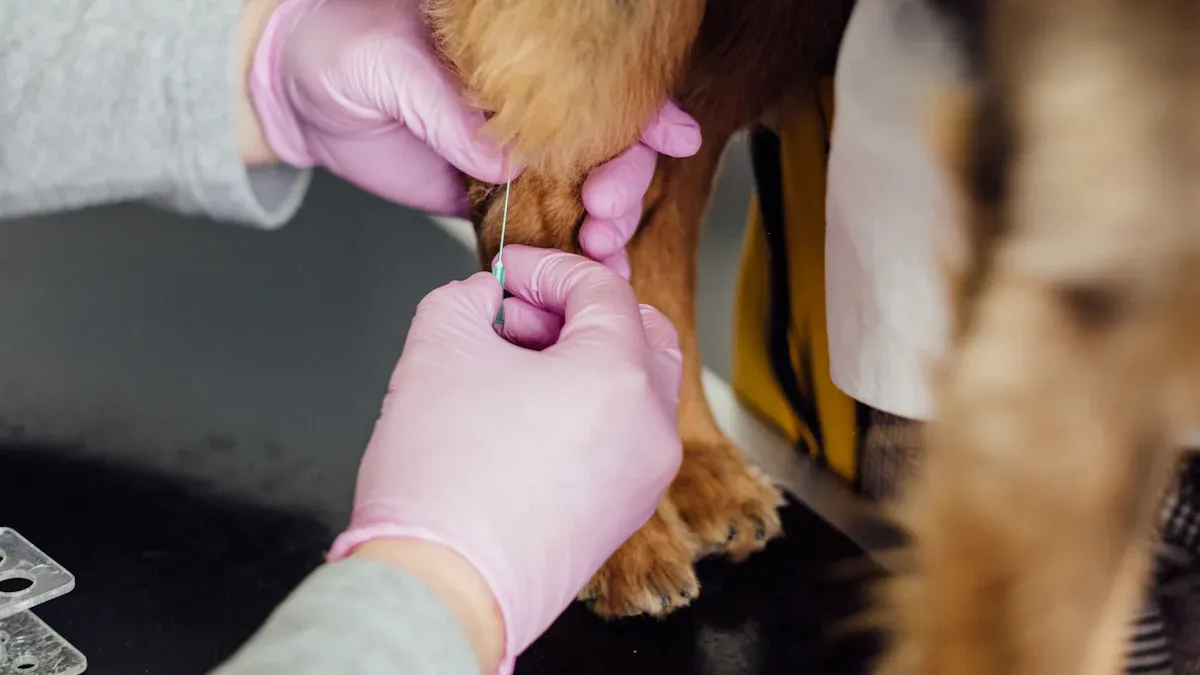
Timing matters too. Pick a moment when your dog is calm, like after a walk or meal. If they’re tired, they’re less likely to resist. Sit on the floor or use a stable surface to position your dog securely. Hold their paw gently and separate each toe to access the nail.
🐶 Note: Always stay patient. Rushing can stress your dog and make the process harder for both of you.
Using rewards to build positive associations
Turning nail trimming into a positive experience is easier with rewards. Treats and praise work wonders to keep your dog happy and cooperative. Start by rewarding them for letting you touch their paws or hold the clippers near them.
During the trimming, give treats after each nail or every few minutes. This reinforces good behavior and helps your dog associate nail care with something enjoyable. Use their favorite snacks or toys to make the process even more rewarding.
🍖 Pro Tip: Keep the treats small and easy to chew so your dog doesn’t lose focus during the session.
With the right tools, a calm setup, and plenty of rewards, you’ll create a safe and stress-free nail trimming routine that your dog will look forward to.
How to Trim Dog Nails Without Hurting Your Pet
Understanding nail anatomy and the quick
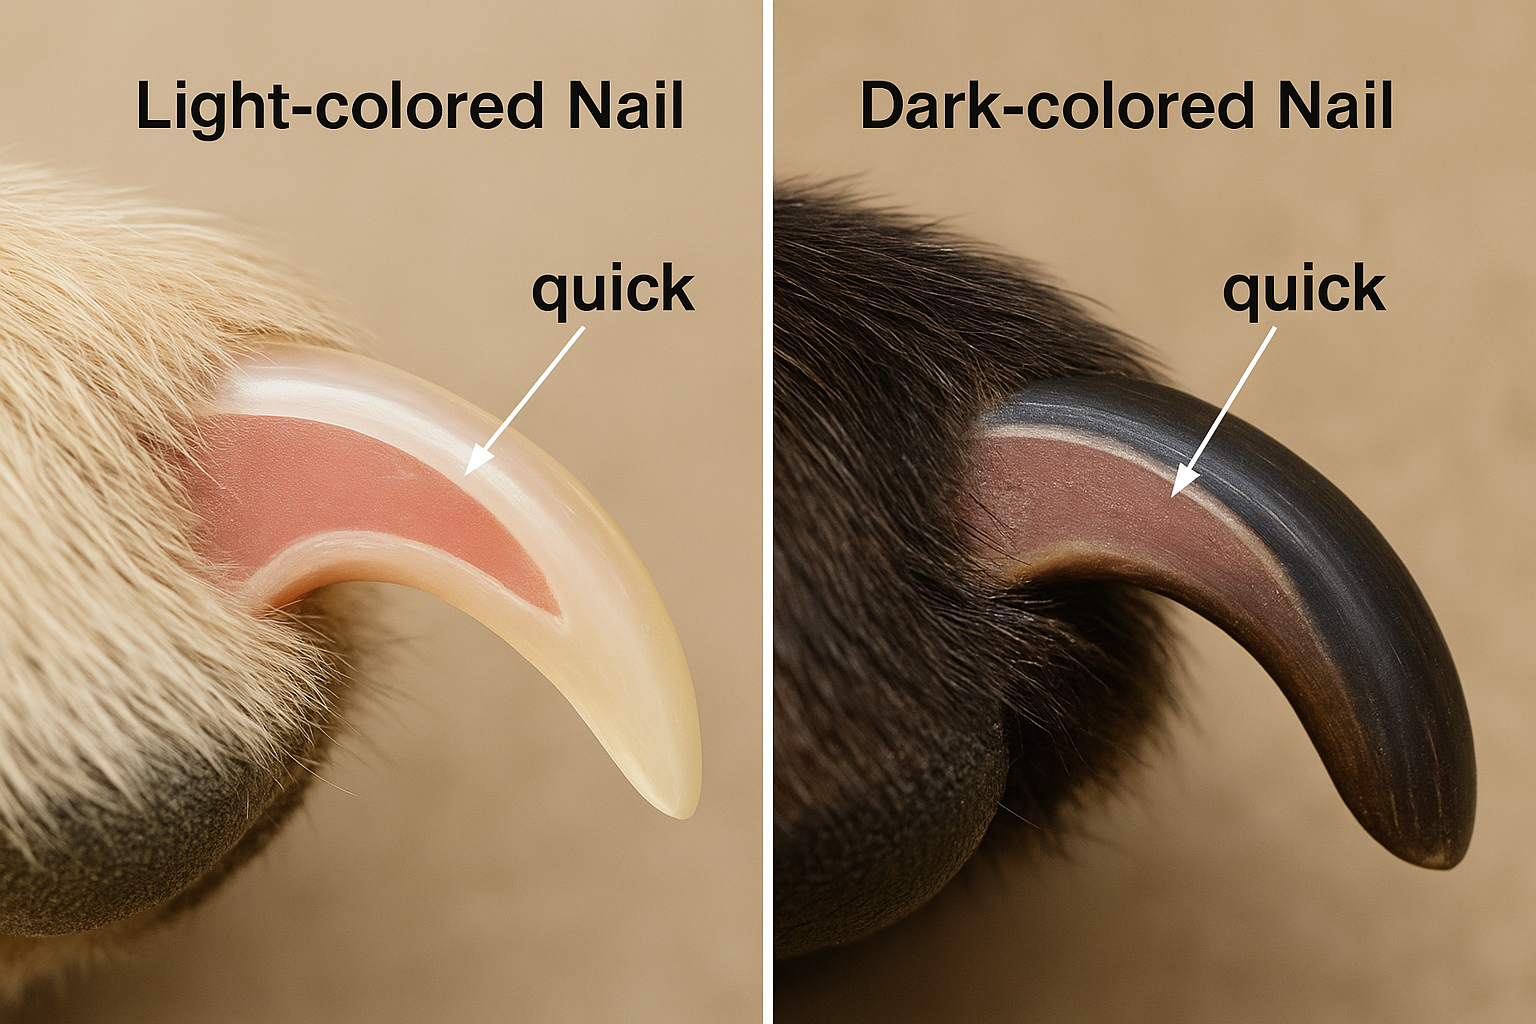
Before you start trimming, it’s important to understand your dog’s nail anatomy. Each nail has a hard outer shell and a soft inner part called the quick. The quick contains blood vessels and nerves, so cutting into it can cause pain and bleeding. For dogs with light-colored nails, the quick is easy to spot—it appears as a pink triangle inside the nail. However, for dark-colored nails, it’s harder to see. You can often find it by examining the underside of the nail for a softer, crumbly texture.
To avoid hurting your dog, always trim above the quick. If you’re unsure, cut small amounts at a time. Stop as soon as you see a lighter, chalky center in the nail. Having styptic powder or silver nitrate sticks on hand is a good idea in case you accidentally cut too close.
|
Feature |
Description |
|---|---|
|
Nail Structure |
Consists of a hard outer shell and a soft inner quick. |
|
Quick Visibility |
Visible in light-colored nails as a pink triangle; harder to see in dark nails. |
|
Identification |
In dark nails, the quick can be identified by examining the underside for a softer, crumbly texture. |
|
Function |
The quick provides nutrition to the nail, essential for its health. |
Special care for dark-colored nails
Trimming dark-colored nails can feel tricky, but it’s manageable with the right approach. Since the quick isn’t visible, take it slow and trim small pieces at a time. After each cut, check the nail’s cross-section. If you see a black or white center, you’re safe to keep trimming. Stop immediately if you notice a gray or pinkish center, as this indicates you’re near the quick.
Here are some tips to make the process easier:
-
Break the process into small steps. Start by gently holding your dog’s paw and rewarding them with treats.
-
Introduce nail clippers gradually. Let your dog sniff and get used to them before trimming.
-
Use plenty of positive reinforcement. Treats and praise can help your dog stay calm and cooperative.
-
Pay attention to your dog’s reactions. If they pull away or seem uncomfortable, take a break.
-
Don’t hesitate to ask for help. A professional trainer or groomer can guide you if needed.
Patience is key when dealing with dark nails. By taking your time and using these techniques, you can safely trim your dog’s nails without causing stress.
Common mistakes to avoid during trimming
Even with the best intentions, mistakes can happen during nail cutting. Here are some common pitfalls to watch out for:
-
Skipping training: Jumping straight into trimming without preparing your dog can lead to resistance and fear.
-
Cutting too much at once: This increases the risk of hitting the quick. Always trim small amounts gradually.
-
Using dull nail clippers: Dull blades can crush the nail instead of cutting it cleanly, causing discomfort.
-
Ignoring your dog’s signals: If your dog seems stressed or pulls away, stop and give them a break.
-
Not filing after trimming: Rough edges can scratch your dog or damage furniture. Use a nail file to smooth them out.
Learning from these mistakes can make the process smoother and safer for both you and your dog. Remember, practice makes perfect, and your confidence will grow with time.
Step-by-Step Guide to Cutting Dog Nails
Gently positioning and securing your dog
Positioning your dog correctly is the first step to a smooth nail trimming session. For small dogs, hold them on your lap or place them on a counter with their back against your body. Medium or large dogs can sit with their back against your legs or lie on their side for better stability. Gently hold their paw and press on the pad to extend the nail. This gives you a clear view of the nail and makes it easier to cut.
If your dog feels nervous, stay calm. Dogs can sense your emotions, so managing your own anxiety helps them relax. Start by touching their paws and nails without trimming. This builds trust and makes the process less intimidating.
🐾 Tip: Keep sessions short and positive. If your dog resists, trim just one paw per day to avoid overwhelming them.
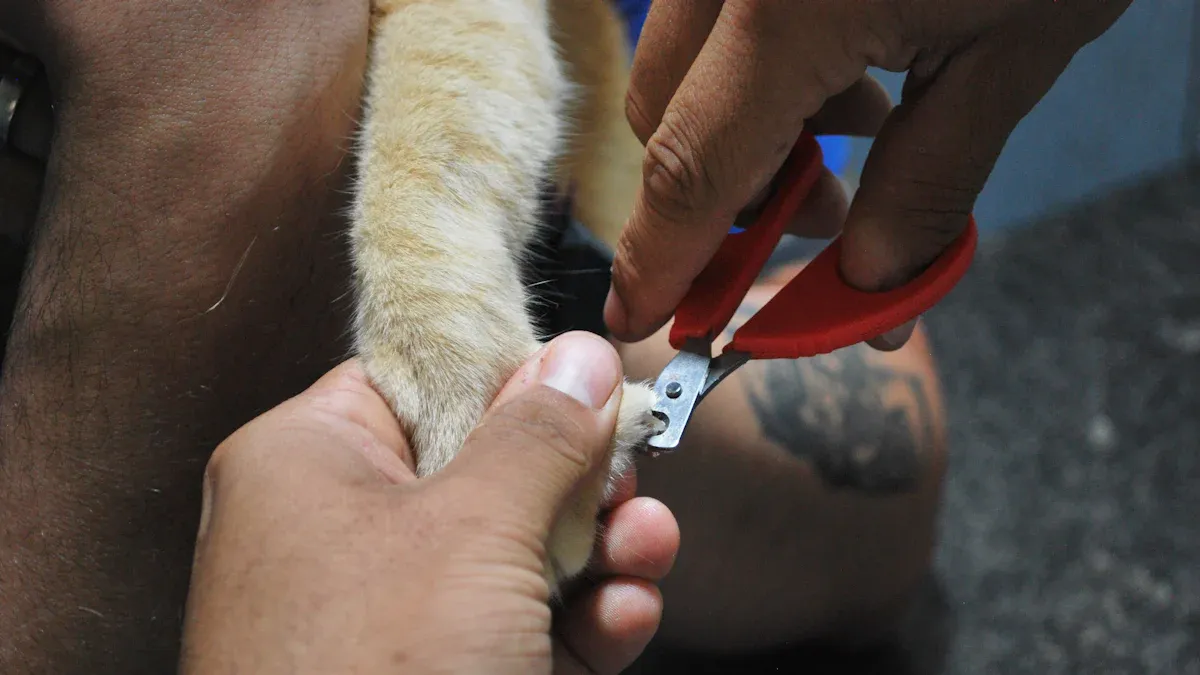
Trimming safely with a 45-degree angle
When you’re ready to cut your dog’s nails, hold the trimmer at a 45-degree angle. This angle prevents splitting and ensures a clean cut. For light-colored nails, trim just before the pink quick. For dark nails, cut small pieces at a time and check the cross-section after each cut. Stop trimming if you see a gray or pinkish center, as this indicates you’re near the quick.
Using tools like LED Pet Nail Clippers can make this step easier. The built-in light helps you see the quick clearly, reducing the risk of accidents. Always keep the trimmer perpendicular to the nail for the best results.
✂️ Pro Tip: If you’re unsure, trim less rather than more. You can always cut again, but you can’t undo cutting into the quick.
Monitoring nail length and taking breaks
Keep an eye on the length of your dog’s nails as you trim. The goal is to cut them short enough to avoid clicking sounds when they walk on hard floors. However, don’t rush the process. Take breaks if your dog seems stressed or restless.
Reward your dog after each nail or every few minutes with treats and praise. This keeps them motivated and helps them associate nail cutting with positive experiences. If you notice any bleeding, stay calm and apply styptic powder to stop it.
🐶 Note: Regular trims every 2-4 weeks prevent overgrowth and make future sessions easier.
By following these steps, you’ll learn how to cut your dog’s nails safely and confidently. With practice, both you and your dog will feel more comfortable during nail cutting sessions.
Dealing with Difficult Trimming Situations
What to do if your dog resists
If your dog doesn’t like nail trimming, don’t panic—it’s normal. Stay calm and take your time. Begin with short sessions and slowly make them longer as your dog gets used to it. Sit on the floor where your dog feels safe, and gently hold their paw. Let them sniff the nail clippers to get familiar with them.
Follow these steps to make it easier:
-
Touch the clippers to one toe while speaking softly. Give a treat if your dog stays calm.
-
Clip just the tip of one nail, then praise and reward them again.
-
Do a few nails at a time, but don’t try to finish all at once.
Practice often to help your dog adjust. Use tasty treats, like small bits of chicken or cheese, to make it fun. If your dog seems stressed, stop and try again later.
🐾 Tip: Pair nail trimming with happy moments to help your dog feel better about it over time.
Handling thick or irregularly shaped nails
Thick or oddly shaped nails can be hard to trim. Use sharp clippers made for dogs, like the Professional Pet Nail Clippers with Light, for better results. If the nails are very tough, a grinder might work better. Grinders smooth rough edges and are great for thick nails.
Here’s how to handle tricky nails:
-
Trim small pieces at a time to avoid too much pressure.
-
Use a grinder after clipping to shape the nail and prevent splitting.
-
For oddly shaped nails, focus on trimming the overgrown parts without cutting the quick.
Some breeds, like Greyhounds or Shepherd mixes, may have special nail needs. Studies show that using calm training and rewards helps these breeds handle nail trims better.
|
Dog Breed |
Nail Trimming Approach |
Result |
|---|---|---|
|
Used calm voice and gentle training techniques. |
Reduced fear over time, making nail trims easier. |
|
|
Shepherd Mix |
Practiced touching paws and gave rewards. |
Became more relaxed and allowed nail trims without stress. |
When to use grinders instead of clippers
Grinders are a good choice for thick nails or dogs who dislike clippers. They’re also safer for beginners because they lower the chance of cutting the quick. Experts suggest using a grinder with low speed and little vibration to keep your dog comfortable.
Grinders work best in these cases:
-
Your dog’s nails are too thick or tough for clippers.
-
You’re worried about cutting the quick and want more control.
-
Your dog prefers the gentle vibration of a grinder over the pressure of clippers.
|
Expert |
Advice |
|---|---|
|
Dannie Stewart |
Use a low-speed grinder with little vibration to avoid hurting your dog. |
|
Dannie Stewart |
Grinders are great for beginners to prevent cutting nails too short. |
Introduce the grinder slowly. Let your dog hear the sound and feel the vibration before you start. Give treats to make it a positive experience. With practice, grinders can make nail care easier and less stressful for both you and your dog.
✨ Pro Tip: Check the nail’s temperature while grinding. Overheating can hurt your dog.
If You Accidentally Cut the Quick
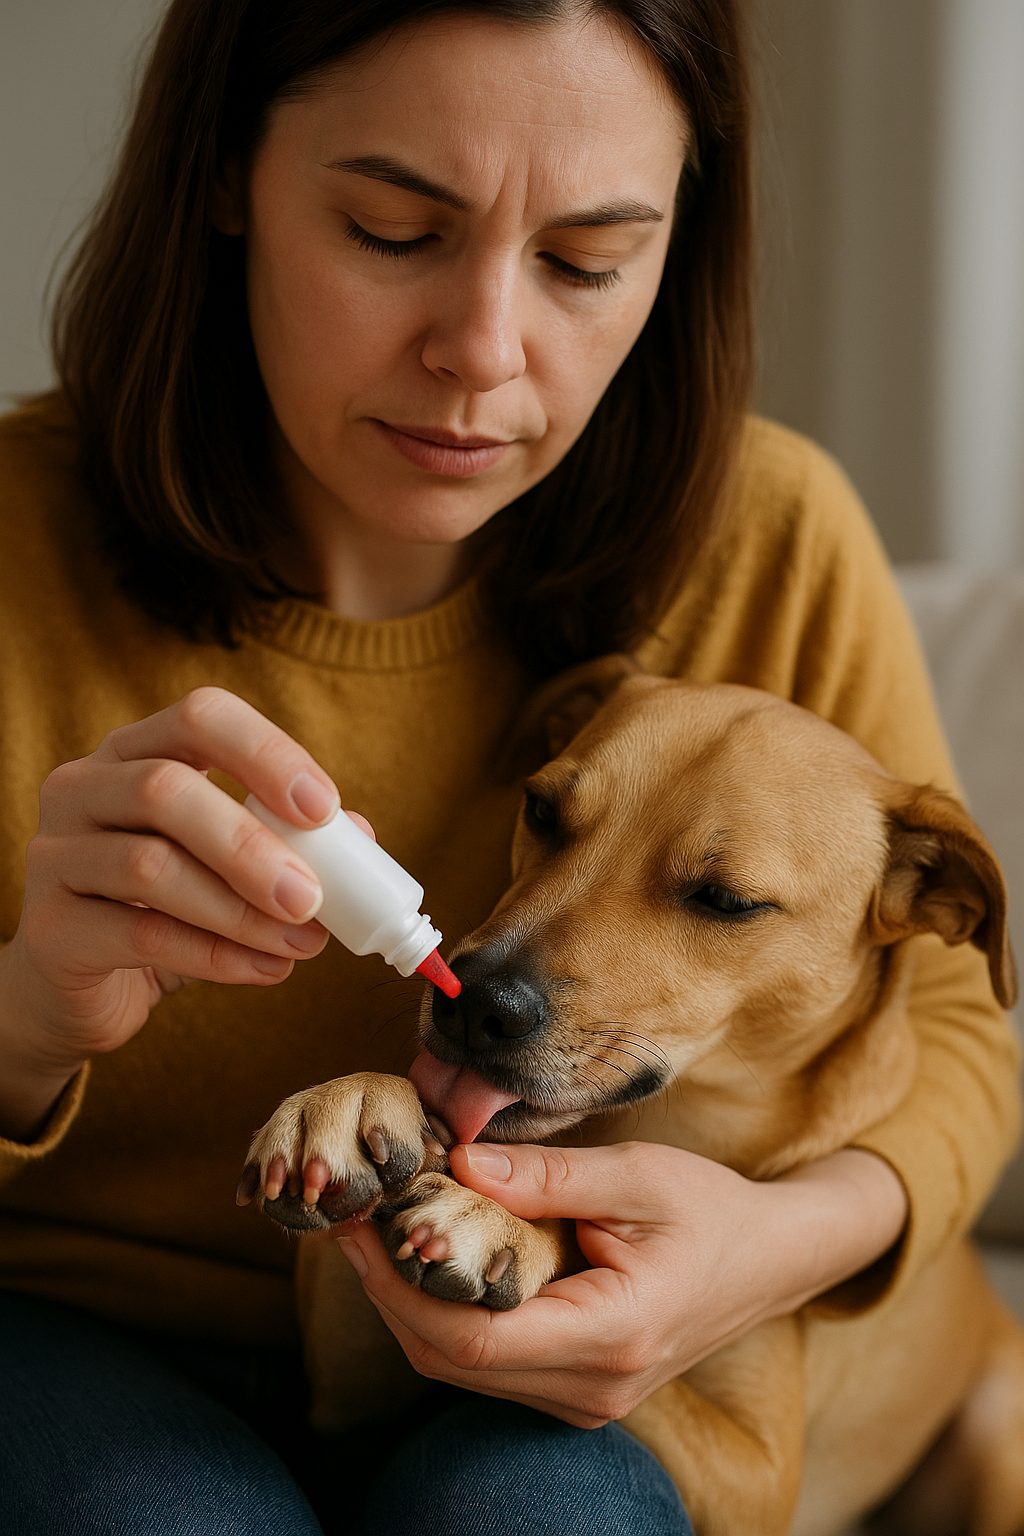
Accidentally cutting the quick can happen, even if you’re careful. The quick is sensitive, so your dog might react with a yelp or pull away. Staying calm is the first step to handling the situation effectively.
How to stay calm and help your dog relax
Your dog will look to you for reassurance. Speak softly and use a soothing tone to help them feel safe. Avoid sudden movements or loud noises, as these can increase their anxiety. If your dog seems scared, give them a moment to settle down before addressing the bleeding.
Patience is key here. Lori Nanan, a certified dog trainer, recommends understanding your dog’s body language to gauge their comfort level. Offering treats during this time can help distract them and create a positive association. Dr. Joanne Loeffler, a Fear Free Certified Practitioner, advises against restraining your dog too tightly, as this can make them more fearful. Instead, gently hold their paw and let them relax naturally.
🐾 Tip: Keep a few high-value treats nearby to reward your dog for staying calm.
Applying styptic powder to stop bleeding
Styptic powder is your best friend in this situation. It quickly stops bleeding and helps the nail heal. Start by applying direct pressure to the nail with a paper towel or compress. Then, dip the nail tip into the styptic powder or cornstarch. Repeat this step until the bleeding stops.
Be aware that styptic powder may sting slightly, so your dog might react. Hold firm pressure on the nail for at least 30 seconds, counting out loud to stay focused. If bleeding continues, maintain pressure for up to 60 seconds. Persistent bleeding for more than 20–30 minutes may require a visit to the vet.
✨ Pro Tip: If you don’t have styptic powder, cornstarch or baking soda can work as a quick home remedy.
Offering comfort and reassurance
Once the bleeding stops, clean the nail gently with a damp cloth. Apply a dog-approved antibiotic to prevent infection. Afterward, offer plenty of comfort to your dog. Pet them, speak softly, and give them their favorite treat or toy.
Dogs have heightened sensitivity in their paw pads, so they might feel nervous after an accidental cut. Gradual desensitization can help them regain confidence. Start by touching their paws lightly during future grooming sessions and rewarding them for staying calm.
🐶 Note: Regularly trimming your dog's nails prevents overgrowth and reduces the risk of cutting the quick.
Pro Tips for Nail Trimming Success
Keep it positive with treats and praise
Making nail trimming a positive experience is one of the best tips for trimming dog nails. Dogs respond well to rewards, so treats and praise can work wonders. Start by holding your dog’s paw for a few seconds. Offer a treat and some kind words to show them it’s safe. Gradually increase the time you hold their paw while continuing to reward them.
Before you even trim dog nails, try mock clipping. Bring the clippers close to their paw, mimic the motion, and immediately give a treat. This helps your dog get used to the process without fear. When you’re ready for the real thing, clip a small portion of the nail and reward them right after. Watch their body language. If they seem stressed, pause and reassure them.
Regular practice is key. The more often you do this, the more comfortable your dog will feel. Over time, they’ll associate nail trimming with treats and praise, making the process easier for both of you.
🐾 Tip: Use high-value treats like small pieces of chicken or cheese to keep your dog motivated.
Don’t rush — take short breaks
Patience is essential when trimming your dog’s nails. Rushing can make your dog anxious and increase the chances of mistakes. Instead, take your time and work at your dog’s pace. If they seem restless or nervous, take a short break. Let them relax before continuing.
Break the session into smaller steps. Trim one or two nails, then pause to give your dog a treat and some praise. This keeps them calm and helps build trust. For larger dogs or those with thick nails, you might need to spread the trimming over a couple of days.
Short breaks also give you a chance to check your progress. Look at the nails you’ve trimmed to ensure they’re the right length. This approach not only keeps your dog comfortable but also helps you trim safely and confidently.
✨ Pro Tip: If your dog resists, don’t force it. Stop for the day and try again later.
Trim regularly to avoid overgrowth
One of the most important dog nail trimming tips is to stay consistent. Regular trims prevent overgrowth, which can lead to serious problems. Long nails can injure the tendons in your dog’s feet and legs. They can also cause posture issues as your dog shifts their weight to avoid discomfort.
Overgrown nails reduce traction, making it harder for your dog to walk on slippery surfaces. By trimming your dog’s nails every 2–4 weeks, you can avoid these issues. Regular trims also make the process easier. Short nails are simpler to maintain, and your dog will get used to the routine.
🐶 Note: Consistency is key. Set a reminder on your phone or calendar to keep up with nail care.
When It’s Better to See a Professional
Signs your dog needs expert care
Sometimes trimming your dog’s nails at home isn’t the best idea. If your dog gets very scared or aggressive, it’s safer to let a professional do it. Dogs with health issues, like arthritis or sore paws, may need extra care to avoid pain.
If you’re unsure about how or when to trim nails, it’s okay to ask for help. Cutting the quick by accident can hurt your dog and cause bleeding. This might make them afraid of nail trims later. Experts know how to handle these situations carefully.
🐾 Tip: If your dog’s nails are thick, oddly shaped, or curling into their paw pads, it’s time to see a professional.
When vets or groomers are better
Professionals like groomers and vets have tools and training to handle tough nail trims. They can safely trim nails for dogs who dislike clippers or have tricky nails. Here’s a comparison:
|
Aspect |
Professional Grooming |
At-Home Care |
|---|---|---|
|
Expertise |
Owners need to learn proper methods |
|
|
Equipment |
Special tools for tough nails |
Basic tools may not work well |
|
Health and Safety |
Low risk of injury or infection |
Mistakes can cause problems |
|
Breed-Specific Needs |
Experts know breed-specific care |
May miss important details |
|
Frequency of Service |
Regular visits keep nails healthy |
Home care may be inconsistent |
Professionals often use grinders, which are gentle and precise. They know how to trim nails to prevent overgrowth and keep paws healthy.
✨ Pro Tip: If you’re new to nail care, book a session with a groomer to learn the right way.
DIY nail care can save money but has risks. Tools can cost $50–$150 and take practice to use correctly. Mistakes, like cutting the quick, can lead to pain or infections. Professionals avoid these problems and keep your dog comfortable during trims.
Trimming your dog's nails at home gets easier with practice. Start small and build your confidence over time. Focus on keeping your dog comfortable and safe during each session. Use tools that make the process smoother, like clippers with built-in lights or safety guards. Patience and consistency are key. When you stay calm and reward your dog, nail care becomes a positive experience for both of you.
🐾 Tip: Regular trims keep your dog’s nails healthy and prevent overgrowth.
FAQ
How often should you trim your dog's nails?
You should trim your dog's nails every 2–4 weeks. Regular trims prevent overgrowth and keep their paws healthy. If you hear clicking sounds when they walk on hard floors, it’s time for a trim.
🐾 Tip: Set a reminder on your phone to stay consistent with nail care.
What should you do if your dog hates nail trimming?
Start slow. Let your dog sniff the clippers and reward them for staying calm. Trim one nail at a time and take breaks if needed. Use treats and praise to make the experience positive. Over time, they’ll feel more comfortable.
Can you use human nail clippers on your dog?
No, human nail clippers aren’t designed for a dog’s nails. They can crush or split the nail, causing pain. Use pet-specific clippers or grinders for safe and effective trimming.
What’s the best way to handle bleeding if you cut the quick?
Stay calm. Apply styptic powder or cornstarch to the nail tip to stop the bleeding. Hold firm pressure for 30 seconds. Offer comfort and treats to help your dog relax afterward.
Should you file your dog’s nails after trimming?
Yes, filing smooths rough edges and prevents scratches. Many pet nail clippers come with a built-in file for convenience. Grinders also provide a polished finish, especially for thick nails.
See Also
Key Considerations When Selecting Nail Clippers for Cats
Choosing Safe Pet Steps for Your Bed: A Guide
Effective Techniques for Removing Matted Cat Fur Safely
Gabby Whale Dog Walking Shoes: Prevent Slips and Protect Paws


2 thoughts on “How to Trim Dog Nails at Home: Safe, Easy, and Fear-Free Guide for 2025”
JamesBoumn
Эта статья полна интересного контента, который побудит вас исследовать новые горизонты. Мы собрали полезные факты и удивительные истории, которые обогащают ваше понимание темы. Читайте, погружайтесь в детали и наслаждайтесь процессом изучения!
Подробнее можно узнать тут – https://vivod-iz-zapoya-1.ru/
Marvinken
Immerse into the vast universe of EVE Online. Test your limits today. Fight alongside hundreds of thousands of explorers worldwide. [url=https://www.eveonline.com/signup?invc=46758c20-63e3-4816-aa0e-f91cff26ade4]Free registration[/url]